Sunday, 6 November 2011

Boats

Captain's log, Star date 9522.6
It's been a while since my last entry... Or any entry for that matter. I'm starting to wonder if it really is just me left... just me and my work.  I'm staying optimistic though, I know that someone WILL post work soon, at least... I hope.


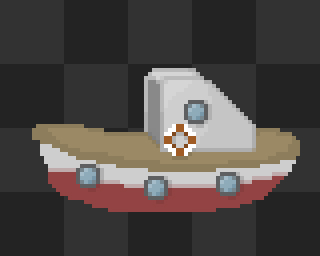
Anyway, with that out of the way, here's a boat I did.#


I know what you're thinking. Too small, right?
Correct, I messed up the resizing and instead of it being x400 it's x100 the rest aren't though... I promise.


20 minutes later, "boat2" was born, I added windows, some shadow and a nifty little life preserver.


And this brings us to boat3, I added some smoke, planks and also change a few little things.


So, It got late. I was going to start with the washed up, shipwrecked version of the boat but I didn't have too much time. So, what I have done is mess around with a few colours and added some seaweed to get a rough idea of what it might look like.

These are I think, x300. I put in the other boat beneath it without smoke (it wouldn't fit) so you can kinda see the differences. I'll finish this, at some point, in the future, sometime. But for tonight I think I'm done.

Captain James T Kirk... signing off.


- Josh

Saturday, 15 October 2011

Some more rock face tiles, I think this is all we will need, so for now the rocks are done. Next will be the inside of the cave.

- Josh
Some rock tiles I started for the mountain.

- Josh

Thursday, 13 October 2011

The Wilson texture that me and Ryan worked on from the original volleyball texture, this is what we're going to be using for now, for the Wilson model Ryan is working on. When the entire model is complete a new texture might have to be made to accommodate the torn parts of the ball.

-Josh
I forgot to mention that the sand tiles have been chosen, they were one of the first things to be done, the top will be light sand the middle will be damp sand and the bottom will be wet sand, to ease the transition to the water.


And a little while after that I completed the entire sea tileset, I put the shape of the waves from the sand below the water so you can see them faintly to give a better transition between sand and sea.
It's a bit small because I saved it as the wrong size, the same as the sand tiles coming up.

When I had the sand and the water the next order of business was to do the transition between the two which took quite a while because there was some tricky corner tiles to do.


-Josh
I started a rock tile for our mountain and decided that it was looking a bit boring, so I created a few rock plants to go in the cracks in the mountain, here's one of them.
This is fully coloured

Here are some leaves that I decided to do ready for the plants I'm going to be creating, they're not coloured yet, just different shades of green so I can tell the leaves apart.
These are not fully coloured


-Josh
So, these following blog posts are going to be filled with quite a bit of work as I haven't updated in a while, I decided that the sand tile was a bit bland when used EVERYWHERE, so I decided to make a rock tile to help break up the boring repeated sand tile.

Then, what I found is that using the same rock tile OVER and OVER starts looking a bit repetitive too. SO! What I did was create multiple rock tiles, now it's starting to look a lot better.

Now I thought, this is starting to look good but the wet sand looks empty so I put some rocks on the wet sand but it just didn't look right, SO! what I did was create some shells to go on the wet sand tiles.

-Josh